Raspberry Pi as a home privacy box: DNS filtering and safe remote access
A Raspberry Pi can sit quietly in a corner and do two useful privacy jobs for your whole home: block trackers and ads at the DNS level, and give you private access to your home network when you are away. It needs very little hardware for that.
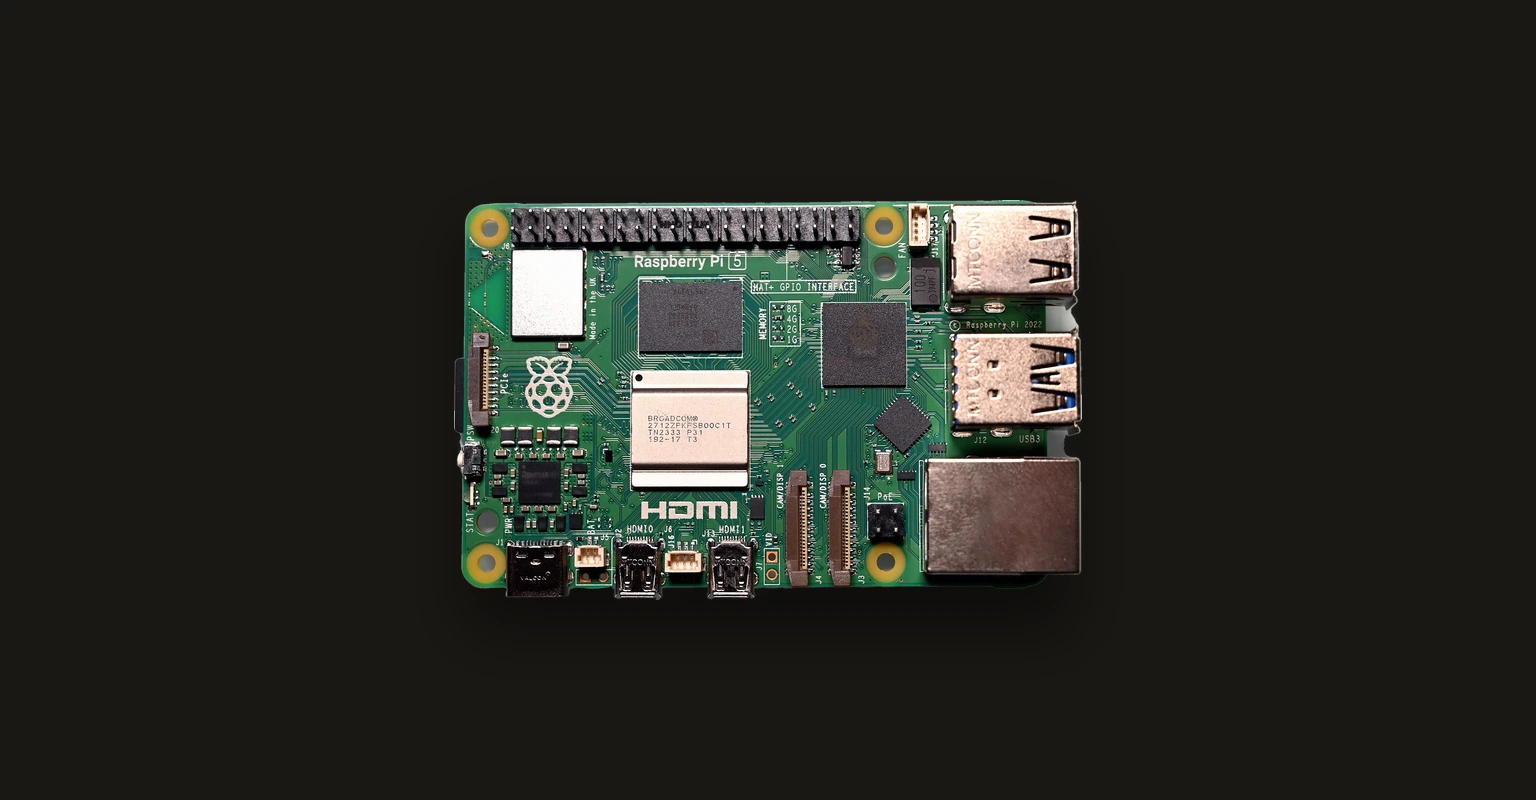
Raspberry Pi as a home privacy box: DNS filtering and safe remote access
A Raspberry Pi can sit quietly in a corner and do two useful privacy jobs for your whole home: block trackers and ads at the DNS level, and give you private access to your home network when you are away. It needs very little hardware for that.
Who this guide is for
Anyone comfortable typing a few commands into a terminal who wants network-wide tracker blocking and a private way to reach home devices, without paying a monthly fee. The filtering stays on your own box; the remote access leans on Tailscale’s hosted service (see “Tradeoffs and friction”). If you do not want to maintain a small Linux machine, skip to “When this is overkill”.
What this guide does not solve
- Hiding your browsing from your internet provider. DNS filtering removes requests to known tracking domains; it does not encrypt or hide the rest of your traffic. See what a VPN does and doesn’t do.
- Devices that ignore your DNS server. Some apps and TVs use their own DNS settings. See the smart TV privacy guide.
- A full firewall or network segmentation. A Pi running DNS filtering is not a router. For that, see network segmentation and the OPNsense guide.
- Every install screen. The Pi-hole and Tailscale docs are kept current by their makers; this guide helps you decide what to build, gives the order that works and the settings that matter, and points to those docs for the rest.
The practical default
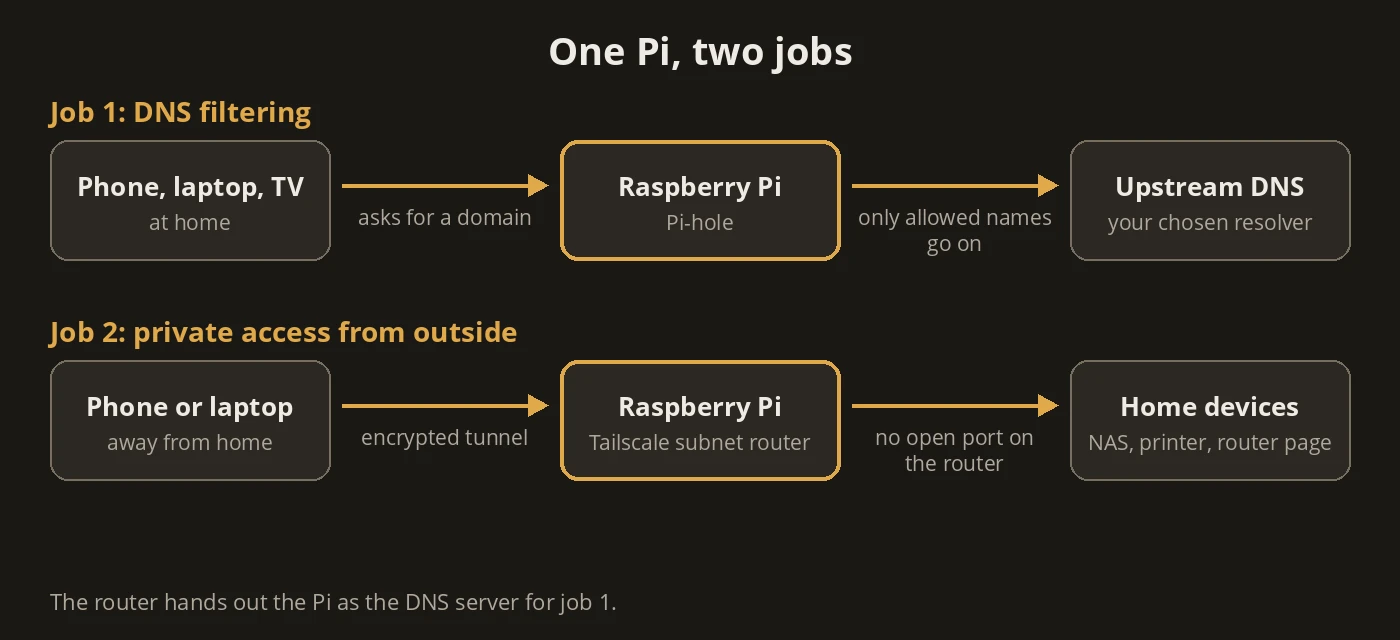
One Pi, two jobs:
- DNS filtering. Install Pi-hole (or AdGuard Home) and make your router hand it out as the DNS server, so every device on your network gets the filtering without any setup. Pi-hole’s own documentation describes exactly this: configure the router so DHCP clients use Pi-hole as their DNS server. If your router cannot do that, you can switch off the router’s DHCP and use Pi-hole’s, or set the DNS server device by device.
- Private remote access. Install Tailscale on the Pi and advertise your home subnet, so your phone and laptop can reach home devices from anywhere without opening any port on your router. Tailscale’s documentation covers the steps: enable IP forwarding, advertise the routes, then approve them in the admin console.
Stop there. The box does two jobs, you know where its settings are, and you do not need to learn anything else to benefit.
What hardware you need (less than you think)
Raspberry Pi’s own list price for a 1 GB Pi 5 is US$45, and for a 1 GB Pi 4 US$35; the 1 GB models have been left out of every memory-driven price rise so far. Raspberry Pi raised the 4 GB and larger models in February and April 2026, and the 2 GB models in February and again on 1 October 2026, to US$77.50 for a Pi 5 and US$67.50 for a Pi 4. It advises buyers to “right-size” the memory and compute for what they actually need, and not to pay “for headroom you don’t need”. For this guide, that is the point.
- Pi-hole’s stated minimum is 512 MB of RAM and 2 GB of free storage (4 GB recommended). DNS filtering plus a Tailscale subnet router is far below what a Pi 4 or Pi 5 offers, so the 1 GB model is enough.
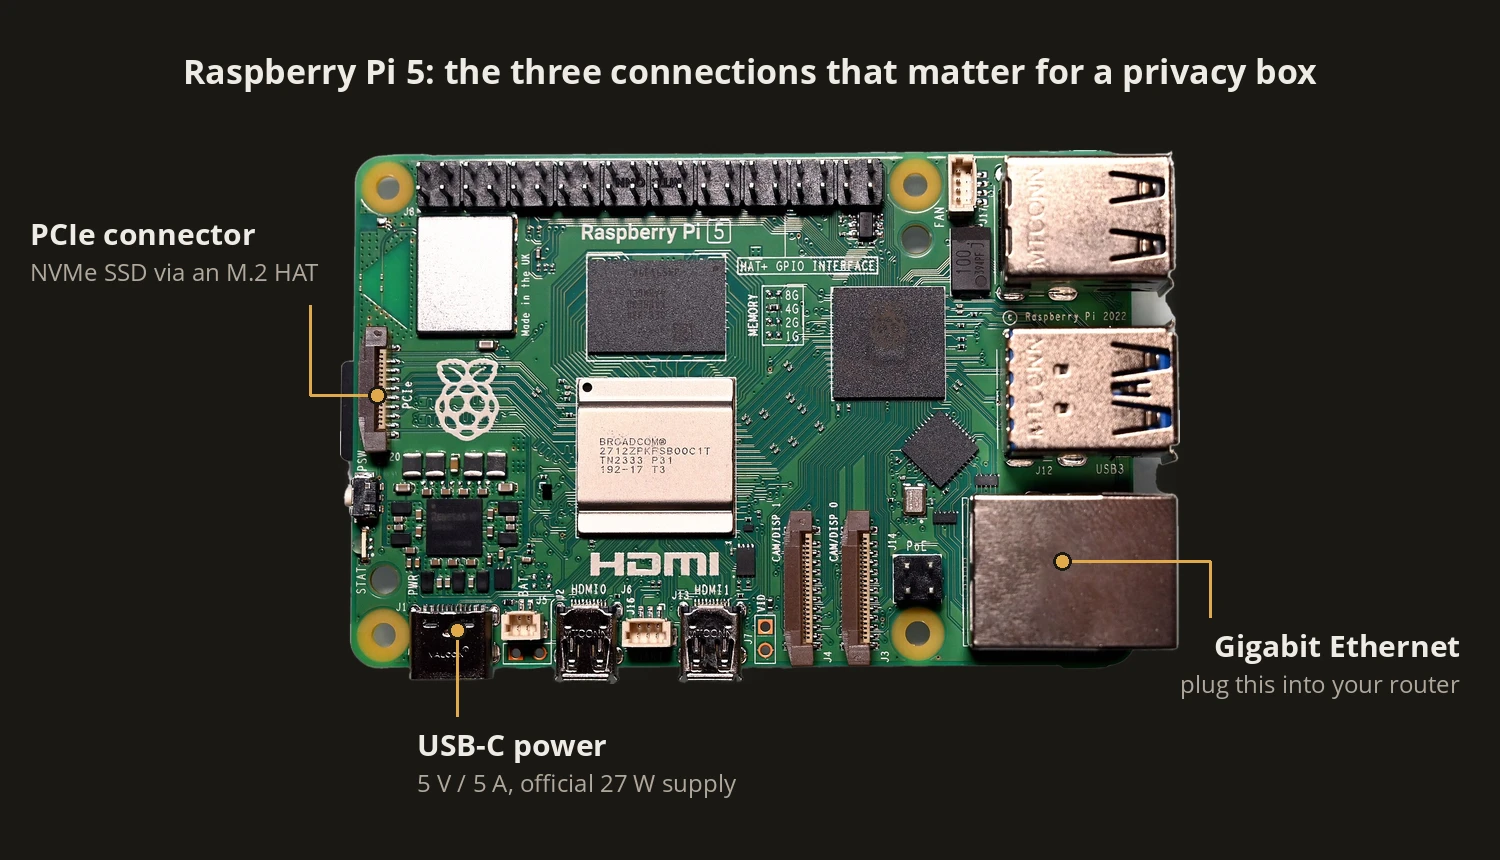
- A Pi 5 needs a good power supply and benefits from cooling. Raspberry Pi recommends its 27 W USB-C supply (5 V/5 A) and says the Pi 5 performs best with active cooling. A Pi 4 needs a 15 W USB-C supply. It warns that you may have problems with an under-powered supply, so do not reuse a cheap phone charger.
- Any always-on Linux machine works. Pi-hole supports Debian, Ubuntu, Fedora and others, not only Raspberry Pi OS. A used mini PC can be a better buy than a new Pi at today’s prices, and usually uses more power.
- Storage: Raspberry Pi’s documentation asks for a microSD card of at least 8 GB for the Lite edition, and says newer models can also boot from USB storage or NVMe. In our judgement, a card that is written to all day is the part most likely to wear out first; an SSD over USB is the sturdier choice if you plan to keep the box for years.
In the Netherlands, one reseller (RaspberryStore) listed a 1 GB Pi 5 at about €60, a 2 GB Pi 4 at about €75, a 4 GB Pi 4 at about €122 and a 4 GB Pi 5 at about €165 on 6 November 2026, VAT included; it listed no 2 GB Pi 5. Raspberry Pi’s own price announcements add up to US$110 for a 4 GB Pi 5. If you find yourself looking at 4 GB or larger boards, look first at whether a used mini PC or a router that already filters DNS does the job.
Setup at a glance
This is the order that works; each step needs the one before it.
- Install Raspberry Pi OS Lite with Raspberry Pi Imager. The current Raspberry Pi OS (release of 6 October 2026) is based on Debian Trixie; Lite has no desktop, which suits a box without a screen. In Imager 2.0, pick your board under Device, then Raspberry Pi OS (other) → Raspberry Pi OS Lite (64-bit) under OS, then your card under Storage. The Customisation steps that follow let you set the Hostname, create your account under User, and under Remote access turn on Enable SSH with Use public key authentication instead of a password, before the card is even written.
- Give the Pi a fixed address. Pi-hole needs a static IP; Pi-hole’s docs say a DHCP reservation in your router is fine, and Raspberry Pi’s docs recommend the reservation over a fixed address set on the Pi itself. Do this before the next step, because the router’s DNS setting will point at this address.
- Install Pi-hole and point your router at it. A headless Pi has no graphical installer, so this step needs a terminal over SSH. Pi-hole’s installer is a
curl ... | bashone-liner; its own documentation notes that piping to bash is controversial because you cannot read the code first, and lists alternatives (clone the repository, or download the script and read it before running it). A fresh install ends by showing a random 8-character password for the web interface: note it, or set a longer one withpihole setpassword. The installer also asks about query logging and a privacy level; at the lowest level the log shows every name each device looks up. Once it runs, enter the Pi’s address as the only DNS server in your router’s LAN or DHCP settings (not the WAN settings); a public second DNS server lets devices skip the filter. If your router also hands out IPv6 DNS servers, change that too: Pi-hole’s FRITZ!Box guide has a separate IPv6 step, and a device that receives another IPv6 DNS server can skip the filter the same way. Devices pick up the change when they renew their DHCP lease, often after a restart. Write down the router’s old DNS setting first, so you can switch back if the Pi is ever down. - Install Tailscale and advertise your subnet. Installing and advertising also happen in the terminal (Tailscale’s Linux install script,
tailscale upto sign in, IP forwarding,tailscale set --advertise-routes). With IP forwarding on, Tailscale wants a firewall that denies forwarding by default and names ufw and firewalld as doing that; Raspberry Pi OS Lite’s package list has neither, so you add one yourself. With ufw, allow SSH, Pi-hole’s ports (see Pi-hole’s Prerequisites page) and traffic ontailscale0before you runufw enable, or you can lock yourself out. Then approve the routes in the admin console: on the Machines page, open the Pi (it carries a Subnets badge), go to its Subnets section, select the routes and Save. Phones, Windows and macOS pick up the routes on their own; a Linux laptop has to accept them (Tailscale’s--accept-routesoption). Tailscale’s default policy lets every device in your tailnet reach the others, and the home subnet with them; add access rules before you invite anyone else. Tailscale suggests disabling key expiry on servers so the Pi does not drop off your tailnet (Machines → the menu icon next to the Pi → Disable key expiry); it also warns that this lowers security, so only do it for a device you trust. Do not advertise a default route from a subnet router; use an exit node for that.
Already have a setup?
- A Pi on Raspberry Pi OS Bookworm keeps working; Raspberry Pi still publishes Bookworm-based “Legacy” images. Raspberry Pi advises against upgrading to Trixie in place: install a fresh image instead, after backing up your Pi-hole settings (Pi-hole’s Settings → Teleporter).
- Pi-hole v5: the move to v6 changes the web interface, the password command and the config file; see the “Already have a setup?” part of the Pi-hole review before running the update.
Tradeoffs and friction
- The Pi is now a single point of failure for DNS. If it crashes or loses power, your whole household loses the internet until you fix it, or until you point the router elsewhere. That is the honest cost of centralising DNS. Decide in advance who can reboot it when you are not home.
- Updating is your job. Raspberry Pi recommends updating through APT (
apt) for the software, kernel and firmware. Pi-hole updates separately with its ownpihole -up, and its docs ask you to read the release notes first. Tailscale updates through the same package manager, and new tailnets have its auto-updates on by default. A privacy box you never patch becomes a risk on your own network. Put a recurring reminder in your calendar. - Blocking breaks things. Blocklists occasionally block a login page, a shop checkout or a smart-TV app. You will need to allow a domain sometimes, and a household member who cannot log in will blame the box.
- Don’t point the Pi at itself for DNS. Pi-hole’s docs show how to make the host use its own blocklists, and warn that if Pi-hole then fails, the Pi loses name resolution too and you cannot easily repair it. Leave the Pi’s own DNS on a normal resolver. Note that a Pi with a DHCP reservation also takes its DNS server from the router, like every other device, so once the router hands out the Pi-hole, the Pi uses itself unless you set a DNS server in the Pi’s own network connection (NetworkManager on current Raspberry Pi OS).
- Do not expose it to the internet. No port forwarding for the Pi. Reach it through Tailscale only.
- Tailscale is a hosted service. You sign in through an identity provider such as Apple, Google or Microsoft, and Tailscale’s coordination service holds device details such as IP addresses, operating systems and location. The traffic itself is encrypted between your devices with WireGuard. You can self-host the control server with Headscale; see the Tailscale guide.
- Physical access matters. Encrypting the Pi’s storage usually means typing a passphrase after every reboot, which defeats an unattended box. This guide assumes the Pi sits inside your home. For the laptops that connect to it, see full-disk encryption.
Stronger setup later
Only after the default has been running for a few weeks:
- Self-host a service such as Nextcloud or an XMPP server on the same or a second Pi. This is a real step up in upkeep and in risk, because you now run software for other people. Keep it reachable only through Tailscale.
- Filtering when you are away. Tailscale’s own Pi-hole guide makes the Pi the DNS server for your whole tailnet: in the admin console’s DNS page, Add nameserver → Custom → the Pi’s Tailscale address (100.x.y.z) → Save, then turn on Override DNS servers. Devices connected to your tailnet then ignore their local DNS, so if the Pi is down they have no DNS until you switch Tailscale off on them. The same guide starts Tailscale on the Pi with
--accept-dns=false, because the Pi is the DNS server (on a Pi already in your tailnet:tailscale set --accept-dns=false), and has Pi-hole answer queries arriving over Tailscale (Settings → DNS, switch from Basic to Expert, Interface settings → Permit all origins). Pi-hole warns that this option is only safe on a properly firewalled device, which is one more reason never to forward a port to the Pi, and Tailscale’s guide asks for a strong web interface password with it. - A second DNS box, so one failure does not take the household offline.
- A proper router or firewall if you start wanting separate networks for guests and smart devices.
When this is overkill
- You already have a router with built-in filtering. GL.iNet travel routers can run AdGuard Home themselves (see the GL.iNet setup guide), and OPNsense can through a community plugin that is not on its official list. Then a Pi adds a second thing to maintain for little gain.
- You want filtering on one device only. A browser extension or your DNS settings on the device does that without a server.
- You will not patch it. A neglected Pi is worse than no Pi.
- You want a VPN for privacy from your ISP. That is a different tool; see the VPN comparison.
Next step
Finish the job
- Privacy DNS guide: choose your upstream DNS provider
- Tailscale guide: the remote-access side in more depth
- Network segmentation: separate networks for guests and smart devices
Cover and ports image: “Raspberry Pi 5” by SimonWaldherr via Wikimedia Commons, licensed CC BY 4.0; background removed and recomposed on a dark canvas, labels added. Diagram: PrivacyGear. Logo panel: Raspberry Pi logo from raspberrypi.com, Pi-hole logo from the project’s MIT-licensed graphics repository, AdGuard and Tailscale marks via Wikimedia Commons (public domain). Raspberry Pi is a trademark of Raspberry Pi Ltd; all logos are trademarks of their owners and their appearance here does not imply endorsement.